
VoxTell: Free-Text Promptable Universal 3D Medical Image Segmentation
Paper • 2511.11450 • Published • 1
![]()
![]()
![]()

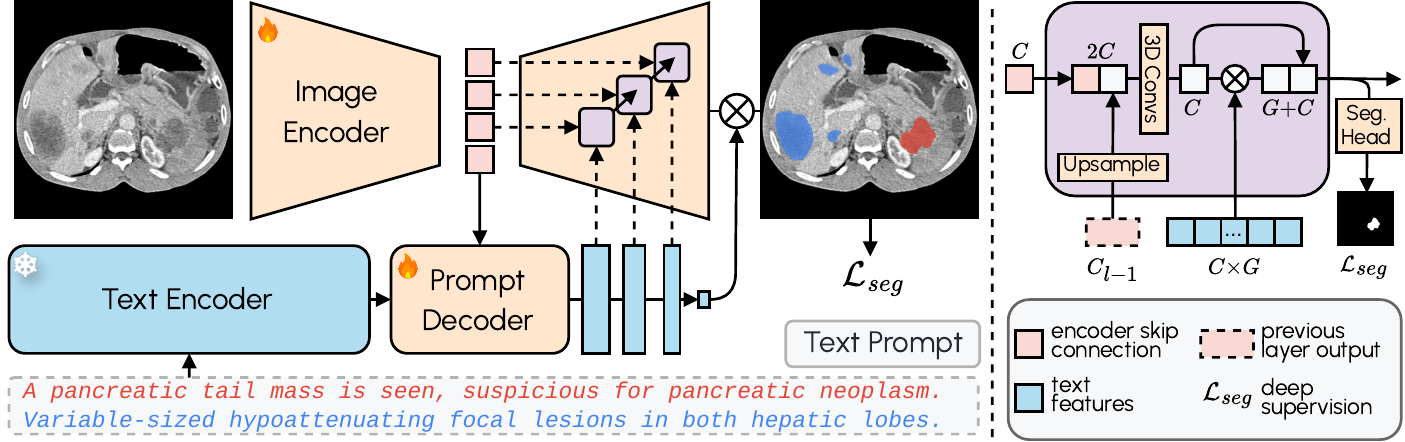
VoxTell is a state-of-the-art 3D vision-language segmentation model that directly maps free-form text prompts to volumetric masks in medical imaging. Unlike traditional segmentation models that require predefined class labels, VoxTell accepts natural language descriptions ranging from single words to full clinical sentences, enabling intuitive and flexible medical image analysis.
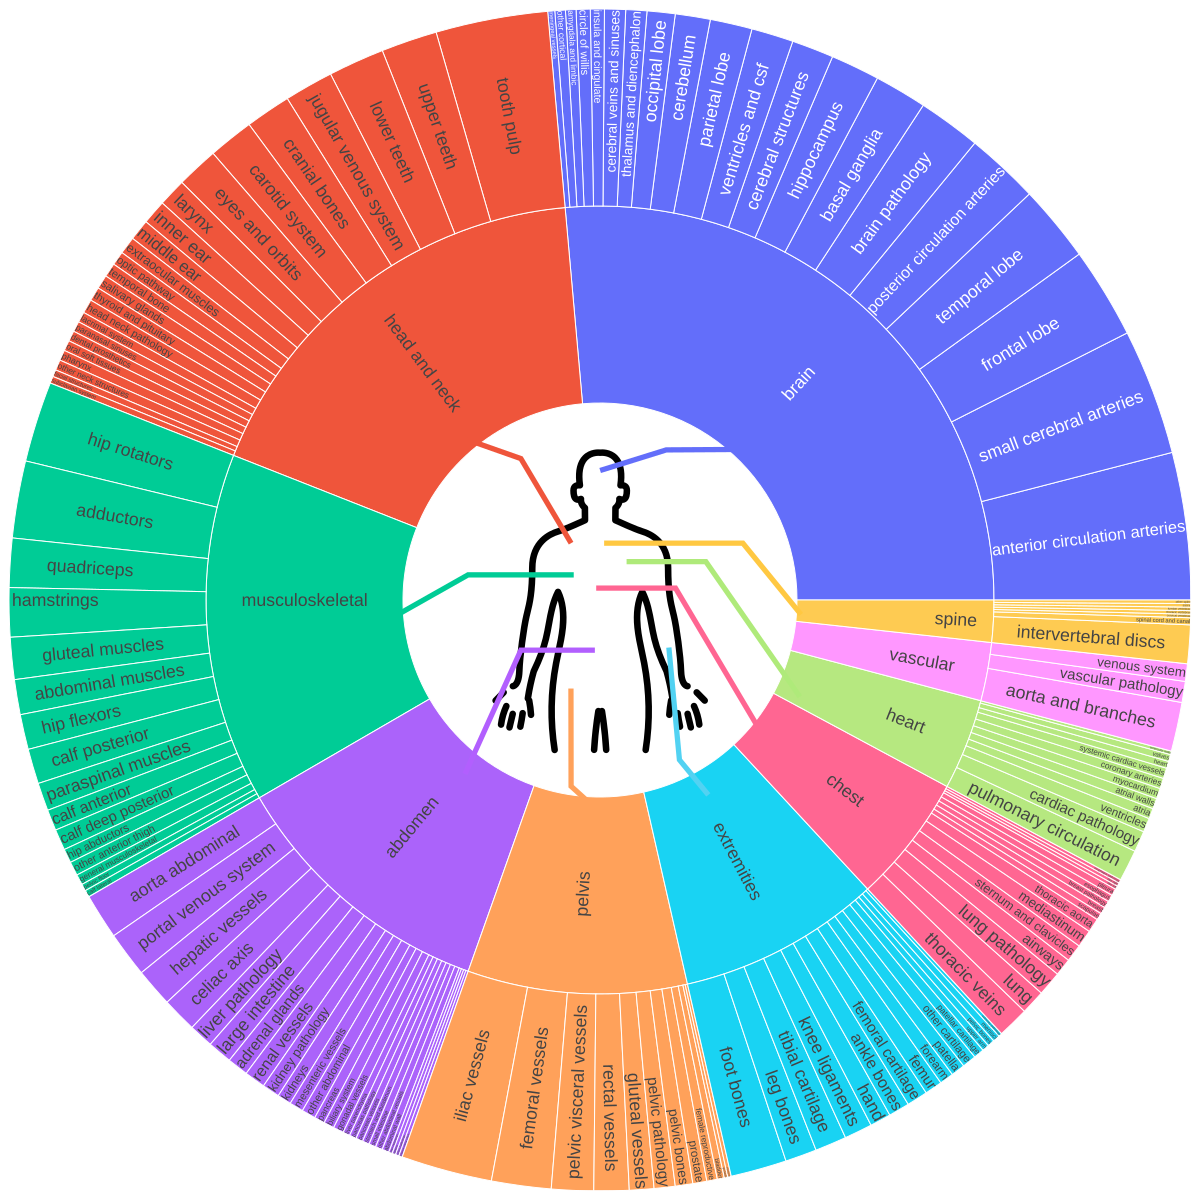
The model is designed for both anatomical and pathological structures across multiple imaging modalities (CT, PET, MRI), being trained on 1000+ familiar concepts while maintaining strong generalization to related unseen classes through its multi-stage vision-language fusion architecture.
We release multiple VoxTell versions (continuously updated) to enable both reproducible research and high-performance downstream applications.
VoxTell combines 3D image encoding with text-prompt embeddings and multi-stage vision–language fusion:
VoxTell supports Python 3.10+ and works with Conda, pip, or any other virtual environment manager. Here's an example using Conda:
conda create -n voxtell python=3.12
conda activate voxtell
Temporary Compatibility Warning
There is a known issue with PyTorch 2.9.0 causing OOM errors during inference (related to 3D convolutions — see the PyTorch issue here).
Until this is resolved, please use PyTorch 2.8.0 or earlier.
Install PyTorch compatible with your CUDA version. For example, for Ubuntu with a modern NVIDIA GPU:
pip install torch==2.8.0 torchvision==0.23.0 --index-url https://download.pytorch.org/whl/cu126
For other configurations (macOS, CPU, different CUDA versions), please refer to the PyTorch Get Started page.
Install the latest version directly from the repository (you can also use uv):
pip install git+https://github.com/MIC-DKFZ/VoxTell.git
For development, clone and install in editable mode:
git clone https://github.com/MIC-DKFZ/VoxTell
cd VoxTell
pip install -e .
👉 NEW: Try VoxTell interactively in the napari viewer
VoxTell downloads its default model (voxtell_v1.1) automatically on first use and caches it (in
the standard Hugging Face cache, ~/.cache/huggingface), so the examples below work without any
setup.
To download a copy into a directory you control (e.g. to use a different or custom model), fetch
it with the Hugging Face huggingface_hub library:
import os
from huggingface_hub import snapshot_download

MODEL_NAME = "voxtell_v1.1"        # the default model
DOWNLOAD_DIR = "/home/user/temp"   # where to put the model

local = snapshot_download("mrokuss/VoxTell", allow_patterns=f"{MODEL_NAME}/*", local_dir=DOWNLOAD_DIR)
model_path = os.path.join(local, MODEL_NAME)  # e.g. "/home/user/temp/voxtell_v1.1"
Then point VoxTell at that directory with the VOXTELL_MODEL environment variable (or pass
-m/model_dir to override per run):
export VOXTELL_MODEL=/path/to/voxtell_v1.1 # a local model directory (e.g. add to ~/.bashrc)
Once a model has been downloaded it is cached, so subsequent runs work offline.
VoxTell provides a convenient command-line interface for running predictions:
voxtell-predict -i input.nii.gz -o output_folder -p "liver" "spleen" "kidney"
Single prompt:
voxtell-predict -i case001.nii.gz -o output_folder -p "liver"
# Output: output_folder/case001_liver.nii.gz
Multiple prompts (saves individual files by default):
voxtell-predict -i case001.nii.gz -o output_folder -p "liver" "spleen" "right kidney"
# Outputs:
#   output_folder/case001_liver.nii.gz
#   output_folder/case001_spleen.nii.gz
#   output_folder/case001_right_kidney.nii.gz
Save combined multi-label file:
voxtell-predict -i case001.nii.gz -o output_folder -p "liver" "spleen" --save-combined
# Output: output_folder/case001.nii.gz (multi-label: 1=liver, 2=spleen)
# ⚠️ WARNING: Overlapping structures will be overwritten by later prompts
| Argument | Short | Required | Description |
|---|---|---|---|
--input |
-i |
Yes | Path to input NIfTI file |
--output |
-o |
Yes | Path to output folder |
--model |
-m |
No | Path to a local model directory. If omitted, uses VOXTELL_MODEL or downloads the default model (voxtell_v1.1) from Hugging Face |
--prompts |
-p |
Yes | Text prompt(s) for segmentation |
--device |
No | Device to use: cuda (default) or cpu |
|
--gpu |
No | GPU device ID (default: 0) | |
--save-combined |
No | Save multi-label file instead of individual files | |
--embeddings |
No | Use a local precomputed-embeddings file (.npz) instead of auto-download |
|
--no-precomputed |
No | Skip the automatic precomputed-embeddings download; embed every prompt with the backbone | |
--list-embeddings |
No | List the available precomputed prompts and exit | |
--no-overwrite |
No | Skip images whose outputs already exist | |
--verbose |
No | Enable verbose output |
--inputis either a single folder (all NIfTI files in it) or one or more NIfTI files (absolute or relative to the current directory) — not a mix. The text prompts are embedded once and reused across all images.
# Every NIfTI in a folder
voxtell-predict -i images_folder -o output_folder -p "liver" "spleen"

# An explicit list of files
voxtell-predict -i a.nii.gz b.nii.gz c.nii.gz -o out -p "liver"
Use --jobs to bind each image to its own prompts (images come from the file, so -i is not used).
The union of all prompts across the jobs is embedded only once.
voxtell-predict --jobs jobs.json -o out
// jobs.json
[
  {"image": "a.nii.gz", "prompts": ["liver", "spleen"]},
  {"image": "b.nii.gz", "prompts": ["tumor"]}
]
(For the same prompts on every image, use -p with -i instead.)
For more control or integration into Python workflows, use the Python API:
import torch
from voxtell.inference.predictor import VoxTellPredictor
from nnunetv2.imageio.nibabel_reader_writer import NibabelIOWithReorient

# Select device
device = torch.device("cuda:0" if torch.cuda.is_available() else "cpu")

# Load image
# Keep `props`: it stores the original affine/orientation and is required to save the masks correctly.
image_path = "/path/to/your/image.nii.gz"
img, props = NibabelIOWithReorient().read_images([image_path])

# Define text prompts
text_prompts = ["liver", "right kidney", "left kidney", "spleen"]

# Initialize predictor
predictor = VoxTellPredictor(
      model_dir="/path/to/voxtell_model_directory",  # optional; omit to use $VOXTELL_MODEL or auto-download
      device=device,
)

# Run prediction
# Output shape: (num_prompts, x, y, z)
voxtell_seg = predictor.predict_single_image(img, text_prompts)
Save the masks through the same reader:
import os
import numpy as np

output_folder = "/path/to/output"
os.makedirs(output_folder, exist_ok=True)
writer = NibabelIOWithReorient()

# Option A - one 3D mask per prompt
for prompt, seg in zip(text_prompts, voxtell_seg):
      out_path = os.path.join(output_folder, f"{prompt.replace(' ', '_')}.nii.gz")
      writer.write_seg(seg, out_path, props)

# Option B - a single multi-label 3D file, where each prompt gets its own label
# value (1, 2, 3, ...). Overlapping structures are overwritten by later prompts.
combined = np.zeros_like(voxtell_seg[0], dtype=np.uint8)
for i, seg in enumerate(voxtell_seg):
      combined[seg > 0] = i + 1  # label 1=first prompt, 2=second, ...
writer.write_seg(combined, os.path.join(output_folder, "combined.nii.gz"), props)
# Label legend: {i + 1: prompt for i, prompt in enumerate(text_prompts)}
For many images, the voxtell-predict CLI and predictor.predict_from_files /
predict_from_jobs (below) handle this saving for you.
To segment many images with the same prompts, use predict_from_files. The text prompts are
embedded once and reused across every image (a folder, a single file, or a list of files):
predictor = VoxTellPredictor(device=device)   # model auto-downloads (or set $VOXTELL_MODEL)

written = predictor.predict_from_files(
    inputs="/path/to/images_folder",          # folder, file, or list of files
    output_folder="/path/to/output",
    text_prompts=["liver", "spleen"],
    save_combined=False,                       # one file per prompt (default)
)
For different prompts per image, use predict_from_jobs (the union of all prompts is embedded
once):
predictor.predict_from_jobs(
    jobs=[
        {"image": "a.nii.gz", "prompts": ["liver", "spleen"]},
        {"image": "b.nii.gz", "prompts": ["tumor"]},
    ],
    output_folder="/path/to/output",
)
You can also embed prompts yourself and feed the embeddings into predict_single_image to reuse
them across custom loops:
embeddings = predictor.embed_text_prompts(["liver", "spleen"])
seg = predictor.predict_single_image(img, text_embeddings=embeddings)
Common prompts are precomputed and downloaded automatically from Hugging Face, skipping the Qwen3 backbone; anything uncovered is embedded on the fly. To override:
VoxTellPredictor(embedding_bank="/path/to/embeddings.npz")  # explicit local file
VoxTellPredictor(use_precomputed_embeddings=False)          # always use the backbone
You can visualize the segmentation results using napari:
pip install napari[all]
💡 Tip
If you work in napari already, the napari-voxtell plugin offers the fastest way to explore VoxTell results interactively.
import napari
import numpy as np

# Create a napari viewer and add the original image
viewer = napari.Viewer()
viewer.add_image(img, name='Image')

# Add segmentation results as label layers for each prompt
for i, prompt in enumerate(text_prompts):
      viewer.add_labels(voxtell_seg[i].astype(np.uint8), name=prompt)

# Run napari
napari.run()
Transfer VoxTell's pretrained image encoder into nnU-Net and fine-tune it for multi-class segmentation. The image encoder is transferred and the image decoder is trained from scratch.
1. Preprocess your dataset with standard nnU-Net:
export nnUNet_raw=/path/to/nnUNet_raw
export nnUNet_preprocessed=/path/to/nnUNet_preprocessed
export nnUNet_results=/path/to/nnUNet_results
nnUNetv2_plan_and_preprocess -d DATASET_ID --verify_dataset_integrity
2. Fine-tune (positional dataset configuration fold):
voxtell-finetune DATASET_ID 3d_fullres 0 \
    -pretrained_weights /path/to/voxtell_model/fold_0/checkpoint_final.pth
Use -tr VoxTellTrainer_noMirroring for datasets whose labels distinguish left/right. The
CLI mirrors nnUNetv2_train (--c to resume, --val to validate, etc.), see the
nnU-Net repository for the full argument reference.
⚠️ Image Orientation (Critical): For correct anatomical localization (e.g., distinguishing left from right), images must be in RAS orientation. VoxTell was trained on data reoriented using this specific reader. Orientation mismatches can be a source of error. An easy way to test for this is if a simple prompt like "liver" fails and segments parts of the spleen instead. Make sure your image metadata is correct.
Image Spacing: The model does not resample images to a standardized spacing for faster inference. Performance may degrade on images with very uncommon voxel spacings (e.g., super high-resolution brain MRI). In such cases, consider resampling the image to a more typical clinical spacing (e.g., 1.5×1.5×1.5 mm³) before segmentation.
@inproceedings{rokuss2026voxtell,
      title={Voxtell: Free-text promptable universal 3d medical image segmentation},
      author={Rokuss, Maximilian and Langenberg, Moritz and Kirchhoff, Yannick and Isensee, Fabian and Hamm, Benjamin and Ulrich, Constantin and Regnery, Sebastian and Bauer, Lukas and Katsigiannopulos, Efthimios and Norajitra, Tobias and Maier-Hein, Klaus},
      booktitle={Proceedings of the IEEE/CVF Conference on Computer Vision and Pattern Recognition},
      pages={37538--37557},
      year={2026}
}
For questions, issues, or collaborations, please contact:
📧 maximilian.rokuss@dkfz-heidelberg.de / moritz.langenberg@dkfz-heidelberg.de